Monday, March 7, 2011

Cade's Disneyland Trip

Jeff is always away traveling somewhere for his work it seems like. So to make it a little funner for the kids, he occasionally takes one of them with him if he is going to be somewhere stateside. This time it was Cade's turn. Jeff had some business in Anaheim, CA so he decided to take Cade along and spend a day at Disneyland. He told Cade about the trip 2 days before they were supposed to leave and he was SO excited that he could hardly wait the two days.


He went swimming everyday. The first week in March is not too warm yet, even for California but it sure felt warm enough to them coming from snow. So they had the pool to themselves.


Disneyland was so empty. They went on Pirates of the Caribbean 3 times in a row without even getting off because no one was in line. No lines at the Haunted Mansion, Tea Cups, Tower of Terror, Grizzly Rapids, hardly anywhere. The longest they waited anywhere was about 20 minutes.


DINNER! Compliments of Jeff!


He loved being able to drive in Autotopia.
He had such a great time! He can't hardly wait until his turn rolls around again.

Thursday, March 3, 2011

Sloppy Joe's

My plan today was to make sloppy joe's for dinner. But today has been such a cold and rainy day that I decided I didn't want to wait until dinner for them. So I made them for lunch. Growing up my mom always just used Manwich.
Four letters: Y U C K!

Sorry mom, but I don't like Manwich. I never knew anything but so it didn't matter then. In fact, I didn't even know that you could make sloppy joe's from scratch. Dumb girl I know! I always make my mother in law's recipe now. I love them. So I figured I would pass the recipe along just in case there were some other naive people in the world besides me.
2 pounds ground beef
1 onion - chopped
*Brown together

1 cup tomato sauce
1/2 cup ketchup
3 tbsp brown sugar
2 tbsp white vinegar
1 tbsp mustard
1 tbsp worcheshire sauce
*Add all ingredients to the meat and heat through. So simple yet delicious!

Monday, February 28, 2011

Chicken Enchiladas


I love creamy, cheesy comfort food! But who doesn't? This is my mother in law's recipe and I love it! I have been making it for years and everyone who eats them comments on how yummy they are. You gotta try them!

*In a large bowl mix together:
16 ounces of sour cream
2 cans of cream of mushroom soup
4 ounces of mild, diced green chili's
3 green onions and tops - diced
3/4 cup grated cheese
cooked and cubed chicken - about 3 breasts
I don't know why but I forgot to take a picture of the mixture. Use your imagination!

1 package of tortillas - set aside

You can use the pre-cooked kind of tortillas but I prefer to buy fresh, uncooked ones. You can find them in the refrigerated section usually by the lunch meat or cream cheese or somewhere like that. You take them home and you cook them in a fry pan or on a griddle for about 30 seconds on each side. They are 10 times better than the pre-cooked kind!

I cheat a lot of the time too and I just buy a cooked rotisserie chicken from the deli at the grocery store rather than cooking the chicken for the enchiladas. I pull off the meat from the breasts and some from the legs. It's plenty of chicken.

*After you have cooked the tortillas, put a couple of hearty spoonful's on one side of the tortilla, roll it up and lay it in your greased baking dish.

*After you have filled your dish with tortillas, spread the remainder of the chicken, sour cream mixture on top of the tortillas.

*Then sprinkle with a little more cheese. Bake on 350 for about 25 to 30 minutes. ENJOY!

Wednesday, February 23, 2011

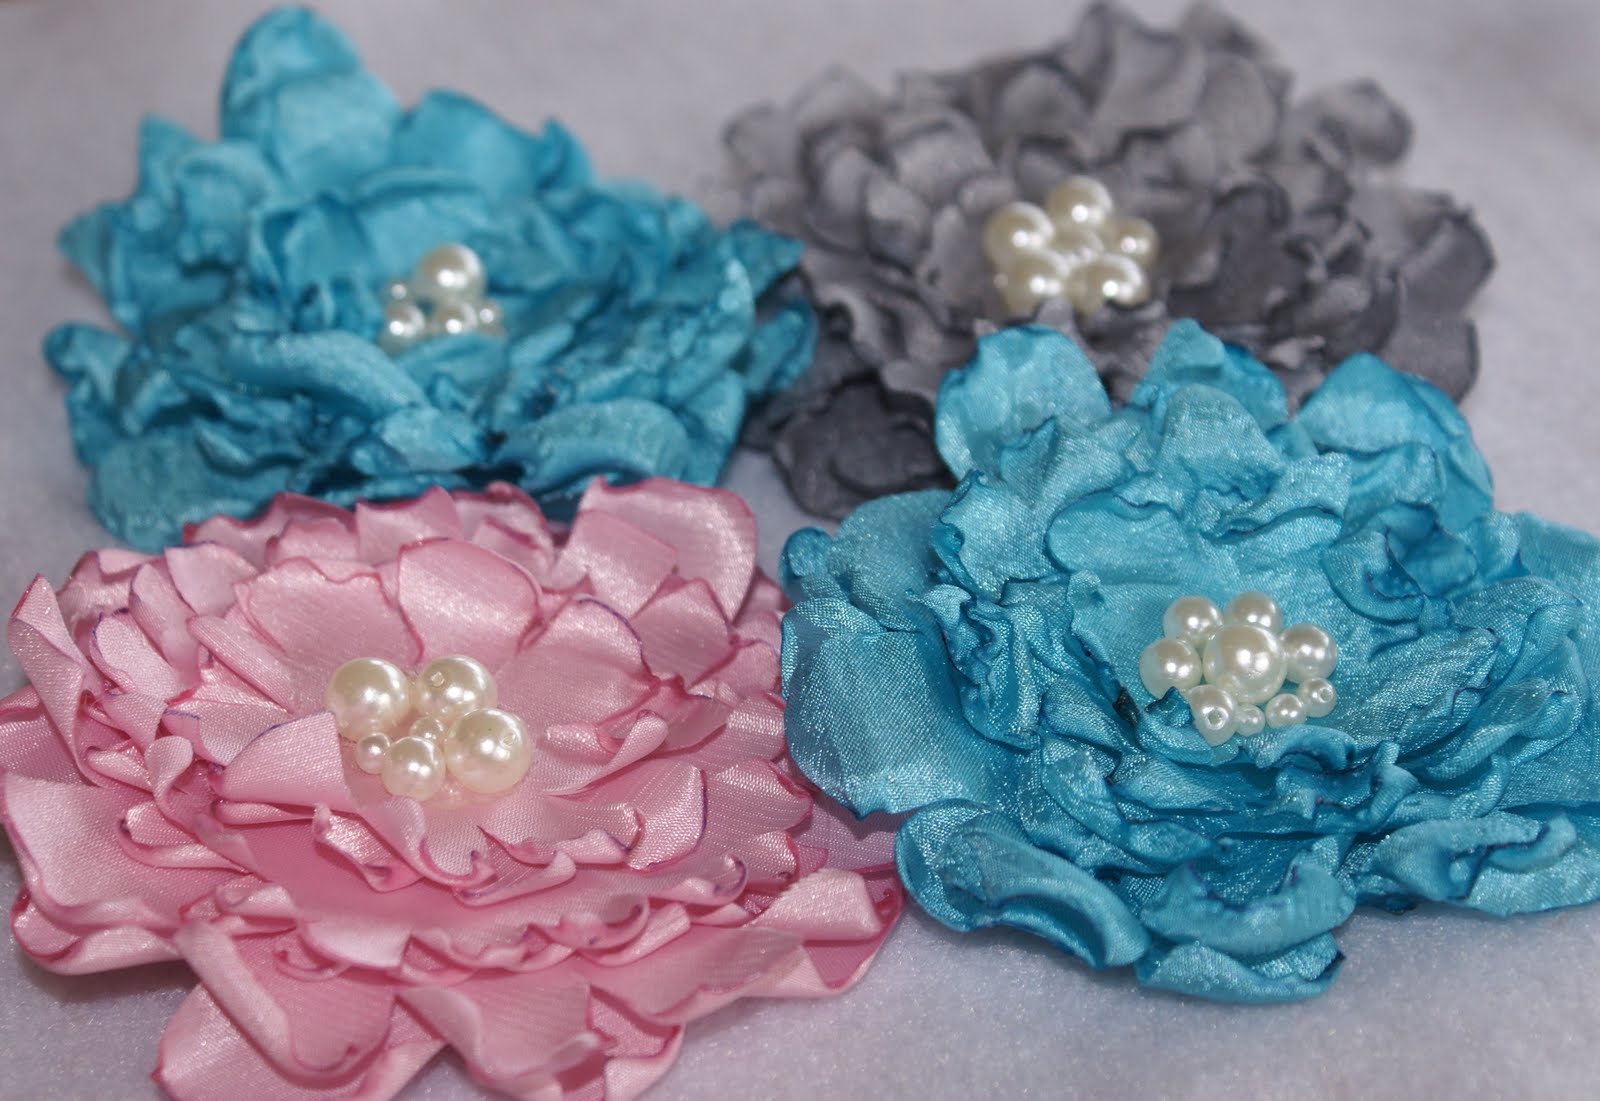
Super cute, super easy flower clips

While we were stuck inside the house during the rainstorms (while we were supposed to be at baseball games.......) Shasta had us make these cute flower barrettes. They are so easy and super cute!
You start out with fabric that is 100% polyester. Very important! 100%POLYESTER. Any thing else will burn rather than melt.

*Cut out 6 circles in graduated sizes. Two of each size. We just used cups and juice lids as guides. Lightly trace around each size with a pen and cut them out.

*Take each circle and cut slits about 1/2 to 3/4 of an inch deep all the way around. You can space each slit wider or closer together. Whatever you like. Closer ones will look more like a mum and further spread out ones will look more like peony when you have your end product.

*Hold the circle over a flame or use an embossing tool to melt the edges. They will melt QUICKLY! Melt all the way around the circle.

*Start with one of the largest circles laying flat, put a dab of hot glue in the middle and stick the next biggest circle on top. Then glue the middle two and then the smallest two.

*Then when you get to the top one, put one last dab of glue in the middle and drop a small cluster of pearls on top. You could also glue a jewel, a button or whatever else you like or have on hand.

*You don't have to but if you glue a piece of felt or some other similar fabric to the back of the flower, it will be more sturdy.

*Take a clip (I like these ones that have a wider more flat surface) and glue ribbon to it and then glue the ribbon covered clip to the back of the flower. They would also be really cute glued to a headband.

And Wha Lah!!! There you have it! I made several of them in no time!
All of these items are available at places such as Jo Ann's Fabric's and Crafts or Hobby Lobby and places like that.

Tuesday, February 22, 2011

President's Day Tournament


Jens had a baseball tournament in St. George this past weekend. It was supposed to go from Friday to Monday. We played 2 games on Friday and the rest of the tournament was cancelled because the weather was so rainy. The WHOLE tournament -- Cancelled!


We lost the first game to a team that is one of the best one's in the state. We didn't give up any runs though. All 4 of their points were made on errors so I can't feel too bad.


We won our second game by 12 so we were feeling great about that.

Even though the tournament was cancelled and we spent most of our time indoors, we still had a fun weekend. Going out to dinner, museums, swimming and shopping.

Saturday, February 12, 2011

Valentine's Day Boxes

I made my kid's Valentine's Day boxes last night. Yes, I made them - - with NO help from my kids. Not because they wouldn't help but because I just took the project over. When I was young I used to LOVE making my Valentine box. I guess I should share the "joy" with the kids some year!


Sidney got a mailbox.

Cade got a puppy dog house. I was going to put a "puppy love" saying above the door with stickers but I made the door too big so I ran out of room.
I just wrapped a shoe box in red wrapping paper, then I cut and inked red strips of red paper for the front. I cut a door out of the lid and covered it with black paper to make the dog door. Put a puppy and a bone on the front of the door and then taped the lid to the box. I think it turned out so cute!

Sunday, February 6, 2011

Ice Castles

Jeff and I took our kids and my mom up to Midway to see the Ice Castles. They were really neat! I saw a news clipping on them a couple weeks ago and have wanted to go see them ever since. The creator of them has been working on them for a few months, trying to get them taller and taller. He is hoping to have them up to 40 feet tall by the end of February.


There were several castles that you could walk through, some having a couple routes through them. At night they are lit up with different colored lights that are in the middle of the ice castles.


I love Midway. I think it is such a pretty little place. The whole town in done in a Swiss theme. All the buildings, gas stations, and grocery stores are all Swiss looking.

I thought these homes were pretty.